
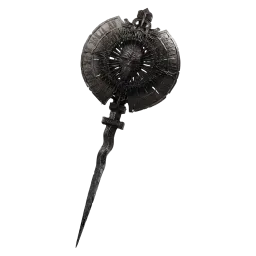
Infinite
SealParry seal — one equipped at a time.

This Mortal Shell II combat page is the Seal + Resolve sheet for Mortal Shell II from Cold Symmetry / Playstack: no stamina bar, one equipped Seal, posture break, then riposte or execute. A Shell is the warrior body you possess — shells. A Seal is the one defensive tool you wear. Verified August 18, 2026 · Steam.
| Fact | Detail |
|---|---|
| Platform | Steam · PS5 · Xbox Series X|S |
| Genre | Soulslike ARPG · no stamina |
| Mode | Single-player |
| Price | $49.99 Standard · $59.99 Devout |
| Release | Advanced Access Aug 17 · worldwide Aug 20, 2026 |
| Developer / Publisher | Cold Symmetry / Playstack |
| Steam | App 2584270 |
| Stamina | None. The spend is Resolve, sitting above HP |
| Attacks | Light (R1) and Heavy (R2) chain and mix; sprint light/heavy to open |
| Seal (equip one) | Infinite = Parry · Untarnished = Guard / Perfect Guard · Vatra = Harden / Perfect Harden |
| Shell | Possessable warrior body (Tiel, Proxima, …) — not a Seal |
| Red attacks | Dodge. Do not treat as a normal Guard. Community: unblockable; Harden may fail — TBA |
| Fourth Seal | Near Marrow Keep — disables achievements. NG+ / second cycle, not the opening kit |
| Last verified | August 18, 2026 |
Mortal Shell II combat does not meter your swings. There is no stamina bar. Light (R1) and Heavy (R2) chain and mix; sprint light or sprint heavy opens a string. You can keep attacking until the animation commits you — not until a yellow bar empties. The real costs are Seal timing, Resolve spend, and the fact that some Seals cannot cancel a swing.
Resolve sits above HP. Hits, kills, and successful Guard / Parry / Harden fill it. Shell abilities, weapon skills, and sidearms empty it. If you came from a stamina soulslike, the habit to drop is “I rolled too much.” The habit to learn is “I dumped the meter into panic shots and had nothing for the ability that actually breaks this fight.”
Untarnished cannot animation-cancel. Once a Light or Heavy is out, you cannot abort that swing into Guard. Infinite and Vatra can cancel mid-swing into Parry or Harden. That is why “no stamina” is not “free mash.” You still pay with frames. Sprint mix-ups open; they do not let you Guard out of a committed R2.
Once that tax is clear, the next job is the meter sitting on top of your health — how you fill it and what you are allowed to spend it on.
Resolve is the only combat spend. It sits above HP. You gain it by hitting, by killing, and by landing Guard, Parry, or Harden. You spend it on shell abilities, weapon skills, and sidearm shots. Exact refill rates and ability costs stay TBA. The rule that does not need a number: panic gun spam wastes the meter you need for the next ability.
| Action | What happens to Resolve |
|---|---|
| Land Light / Heavy / mix | Gain — hitting fills the bar |
| Kill | Gain |
| Guard / Perfect Guard (Untarnished) | Gain on a successful defence |
| Parry (Infinite) | Gain on a successful defence |
| Harden / Perfect Harden (Vatra) | Gain on a successful defence |
| Shell ability | Spend — the host kit, not the Seal |
| Weapon skill | Spend |
| Sidearm shot (Nail Shot, crossbow, minigun-style, …) | Spend — each shot is a tap, not free chip |
A clean melee string plus a timed Seal is how the bar comes back. A sidearm is a spend, not a stamina substitute. Nail Shot (starting gun) is a Resolve tap: one or two shots to finish a stagger or to poke a grab window, not a magazine you empty because you are scared. The Forgotten Crossbow and later guns follow the same tax — sidearms is the roster; this page only cares that every shot is Resolve you will not have for a Shell ability.
The Seal is the defensive tool. Resolve does not make a late Parry land. If Infinite feels inconsistent, you are late on the tell — swap Seal at a beacon, do not dump the bar into Nail Shot hoping the next swing is safer. Tips is the habit list; here the one line is: bank Resolve for the ability that breaks posture, then spend.
The next question is which Seal you are actually wearing when that tell arrives.
You equip one Seal. The rest sit in inventory. Infinite is Parry. Untarnished is Guard / Perfect Guard. Vatra is Harden / Perfect Harden — the returning absorb from Mortal Shell 1, now on a Seal. None of these is a Shell. Tiel, Proxima, and the other hosts are shells; the Seal is the defensive slot you swap at a Beacon.
| Seal | Defence | On time | Animation cancel? | Best vs |
|---|---|---|---|---|
| Untarnished | Hold Guard — no HP while the guard meter drains | Perfect Guard breaks posture, then riposte. Forgiving. Prefer slightly early vs late | No — cannot abort a swing into Guard | Learning tells, ugly wind-ups |
| Infinite | Parry | High-risk, high break. Community: one of the strongest Seals for telegraphed 1v1 bosses | Yes | Clean, readable bosses |
| Vatra | Harden — absorb a hit. You can hold Harden | Perfect Harden refills the Harden bar so you can chain. Staggers the attacker back (unlike Guard) | Yes — mid-swing | Multi-hit strings, add fights, messy angles |
Parry seal — one equipped at a time.
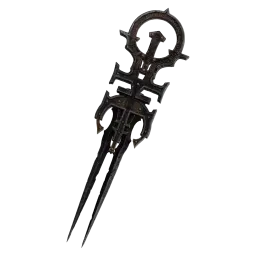
Guard / Perfect Guard.
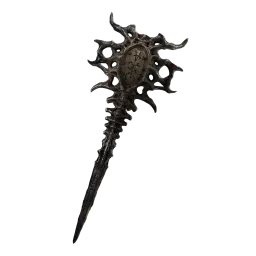
Harden / Perfect Harden.
Hold Guard to take no HP while the guard meter drains. Exact meter size is TBA. Time the press for Perfect Guard: that break is what opens the riposte. The window is forgiving — prefer slightly early over late. Late is a hit. There is no animation cancel: if you already started a Light or Heavy, you ride that swing. Do not plan “R2 into Guard” on Untarnished; the swing owns the frames.
Parry is the high-break check. Miss it and you eat the swing. Land it and posture moves harder than a held Guard. Infinite has animation cancel, so you can abort a committed melee into the Parry. Community call: one of the strongest Seals for telegraphed 1v1 bosses. If the tell is a long wind-up you can read, Infinite is the default. If the tell is a blur of adds, it is not.
Harden absorbs a hit. You can hold it. Perfect Harden refills the Harden bar so you can chain absorbs instead of waiting on a dry gauge. Exact bar values stay TBA. Unlike Guard, a landed Harden staggers the attacker back — you buy space, not just chip-free frames. Cancel mid-swing into Harden when the string is already out. That is why Vatra wins messy rooms: multi-hit enemies and add packs do not require a single clean parry window.
Once you can name those three, the remaining decision is when to actually swap — not mid-combo, at a Beacon.
Swap at a beacon when the fight type changes, not during a string. You still wear one Seal. The opening kit is Infinite, Untarnished, or Vatra. A fourth Seal sits near Marrow Keep and disables achievements — leave it for NG+ / a second cycle. Name TBA (Slayer / Gloomslayer aliases show up in writeups). This table is the mid-page call, not a recap of the glance cards.
| Situation | Equip | Why |
|---|---|---|
| Telegraphed 1v1 boss, readable wind-up | Infinite (Parry) | Max break. Animation cancel lets you abort a swing into the Parry |
| Adds, multi-hit strings, bad camera angles | Vatra (Harden) | Absorb + stagger-back. Perfect Harden chains. Hold if you need a panic absorb |
| Still learning the tell, or the wind-up is ugly | Untarnished (Guard) | Forgiving Perfect Guard. Hold to take no HP while the guard meter lasts |
| You started a Heavy and need defence on Untarnished | Do not swap mid-swing | Untarnished has no cancel — ride the animation or do not swing |
| You started a Heavy and need defence on Infinite or Vatra | Cancel into Parry / Harden | Those two Seals can abort the swing |
| Fourth Seal near Marrow Keep looks tempting | Do not equip it on a trophy run | Disables achievements until NG+ / second cycle |

Rest, change Seal, walk back in. The beginner guide already points the left-path trial at Infinite. Keep Untarnished as the learning default if Parry is eating you. Pull Vatra when the next room is adds or a grab-plus-swing mess. Do not treat the fourth nearby Seal as a secret upgrade on a first cycle.
Changing Tiel for Eredrim does not change the Seal. The host changes how Resolve feels and which ability you spend; the Seal stays the defensive slot. Pair them on builds. If the last death was a red swing you tried to Guard, that is the next section — not another Seal pickup.
Matched by build plan, shared topics, and guide progression — not random related links.
Dodge. Do not treat a red attack as a normal Guard. Community read: reds are unblockable. Whether Harden also fails on them stays TBA — do not bank a first-cycle plan on absorbing a red with Vatra until you have seen that hit land. Roll, then resume the string.
Untarnished Hold Guard and Perfect Guard are for the attacks that are not marked red. A red wind-up is the game telling you the Guard plan is illegal. Infinite Parry is the same warning: if the community unblockable read holds, a parry on red is a hit, not a high-break. Confirm on a trash enemy before you test it on a named boss.
Vatra absorbs normal hits and can stagger the attacker back. Red is the exception until proven. If a grab is telegraphed as red, dodge the grab, then Harden or Parry the follow-up swings that are not red. Great Arbiter of Flesh below is that split: dodge the grab, Harden the swings.
After you survive the red, the win is still posture — break it, then spend the window.
Land hits and timed Seals until posture breaks. Then riposte: Heavy or Light follow-up — both are legal; pick the one that fits the remaining frames. Executions come when posture is broken. An optional difficulty setting can refill HP from executions (easier). A harder option can “turn off the sun.” Neither needs a menu name this page does not have. Exact posture thresholds stay TBA.

A Perfect Guard or a landed Parry / Harden that breaks posture is the riposte cue. Do not dump Resolve into a sidearm in that window unless you need one poke to finish the break. The follow-up is melee. If the optional execution-heal is on, taking the execute is also a heal — use it when you are low, skip it when you would rather keep pressure. Camera can be Immersive or Action; it does not change the break rule.
Great Arbiter of Flesh is an early optional-ish fight near Widow’s Overlook / that Beacon cluster. Kit: Harden on the swings, dodge the grab (treat it like the red/grab rule above), shoot to build Resolve, then execute when posture breaks. It is a Seal + Resolve exam, not a hidden stamina check. Full roster and drops sit on bosses. Arbiter’s Prize is the Infusion Tarstone some runs take after the kill — log that on tarstones, not here.
Wrong Seal for the tell, Resolve wasted on panic shots, or you Guarded a red. Swap Seal at the next rest, stop emptying the gun, dodge the reds. Weapons change the string; they do not replace the Seal. When the break is consistent, the leftover questions are the FAQ — then the host on shells and the pairing on builds.
No. Light (R1) and Heavy (R2) chain and mix without a stamina tax. Resolve, sitting above HP, is the spend for Shell abilities, weapon skills, and sidearms.
Equip the Infinite Seal. Parry is high-risk, high break, and it can animation-cancel a swing. It is not a Shell. Community: one of the strongest Seals for telegraphed 1v1 bosses.
Vatra is Harden / Perfect Harden — the returning absorb from Mortal Shell 1, now on a Seal. Absorb a hit, stagger the attacker back, cancel mid-swing. Perfect Harden refills the Harden bar so you can chain. You can hold Harden.
A Shell is the possessable warrior body (Tiel, Proxima, Eredrim, …). A Seal is the one defensive tool you equip: Infinite (Parry), Untarnished (Guard / Perfect Guard), or Vatra (Harden / Perfect Harden).
Equip Untarnished. Hold Guard to take no HP while the guard meter drains. Time Perfect Guard to break posture, then riposte. Forgiving — prefer slightly early vs late. No animation cancel: you cannot abort a swing into Guard.
At a Beacon. Infinite for clean telegraphed bosses. Vatra when adds or angles are messy. Untarnished while you learn or the tell is ugly. A fourth Seal near Marrow Keep disables achievements — NG+ only.
Dodge them. Do not treat a red as a normal Guard. Community: unblockable. Whether Harden fails on reds is TBA — do not plan an absorb until you have confirmed it.
Hitting, killing, and successful Guard / Parry / Harden. Spend it on Shell abilities, weapon skills, and sidearm shots. Panic gun spam wastes the next ability.
Infinite (Parry) and Vatra (Harden) can animation-cancel mid-swing. Untarnished (Guard) cannot — once the Light or Heavy is out, you ride it.
Harden the swings, dodge the grab, shoot to build Resolve, execute when posture breaks. Early optional-ish fight. Details on the bosses page.
Only if you turned on the optional easier difficulty that refills HP from executions. Default combat does not assume that heal.
No. Single-player only.
August 18, 2026
Matched by build plan, shared topics, and guide progression — not random related links.