
What do Mortal Shell II beacons do?
After a cleanse: rest, heal, refill Mother’s Pulse, swap Shells or the one Seal, and fast-travel with Mether’s Pulse / Mether’s Breath. Resting also respawns nearby enemies.

Mortal Shell II beacons: cleanse corrupted sites, take Ova to Marrow Keep, and unlock fast travel. Full map list stays TBA. Verified August 2026.
Cleanse Beacons, carry Ova, and unlock rest plus fast travel.
~13 min read
This Mortal Shell II beacons page is the rest / cleanse / Ova rule — not a fake all beacons Mortal Shell II map. Mortal Shell II from Cold Symmetry / Playstack parks most sites corrupted. Cleanse the interior, take Ova to Marrow Keep, then rest, swap shells, refill Mother’s Pulse, and fast-travel with Mether’s Pulse / Mether’s Breath. First-region order sits on the walkthrough. Verified August 18, 2026 · Steam.
| Fact | Detail |
|---|---|
| Platform | Steam · PS5 · Xbox Series X|S |
| Genre | Soulslike ARPG · no stamina |
| Mode | Single-player |
| Price | $49.99 Standard · $59.99 Devout |
| Release | Advanced Access Aug 17 · worldwide Aug 20, 2026 |
| Developer / Publisher | Cold Symmetry / Playstack |
| Steam | App 2584270 |
| This page | Cleanse / Ova / rest / travel — not every Beacon name |
| Default state | Most Beacons start corrupted |
| After cleanse | Rest · heal · refill Mother’s Pulse · Shell swap · fast travel |
| Fast travel | Mether’s Pulse / Mether’s Breath — unlocked after the site is cleansed |
| Heal flask | Mother’s Pulse — default 3 charges; refill on rest or death |
| Ova | Appears on purify — carry to Marrow Keep |
| Also on cleanse | Glimpses · stronger flasks · story / nearby gates |
| First cleanse | Village Outskirts — Ova + Muradean Actuator for Franz (Moradian / Meridian; spelling TBA) |
| First-region hub | Widow’s Overlook |
| Early host pin | Water makeshift Beacon — possess Proxima |
| Achievements | Cleanse All Beacons · Collect all Ova |
| Rest side effect | Nearby enemies respawn — do not sit mid-clear unless you want that |
| Full list | TBA — this page will not invent a 60-name table |
| Last verified | August 18, 2026 |
A Mortal Shell II beacon is a rest node, not scenery. After it is cleansed you sit to heal, refill Mother’s Pulse, swap a shell or Seal, and open fast travel. Before that, the stone is a job: most start corrupted, and the site will not behave like a checkpoint until you finish the interior. The walkthrough sequences the first-region pins. This page only names what the interact actually buys.
| Once cleansed | What the sit does |
|---|---|
| Rest / save | Checkpoint — this is the node you route from |
| Heal | Tops the Harbinger before the next room |
| Mother’s Pulse | Refills the heal flask (default 3 charges; also refills on death) |
| Resolve | Community-observed: rest also tops Resolve — still do not dump it into panic shots |
| Shell / Seal swap | Change host or the one equipped Seal — same job as the Shell Keeper in Marrow Keep |
| Fast travel | Mether’s Pulse / Mether’s Breath between cleansed Beacons |
| Nearby enemies | Respawn on rest — a new Beacon is a reset, not an AFK camp |
Those two names look like a typo. They are not. Mother’s Pulse is the drink you carry — default three charges, stronger as you cleanse, refill when you rest at a cleansed Beacon or when you die. Mether’s Pulse and Mether’s Breath are the fast-travel pair that only lights after the site is purified. Mixing them is how a first hour feels “broken”: the flask is empty and you still cannot warp. Merrick in Marrow Keep later sells flask parts; Franz does not. Flask shop rules sit on the walkthrough.
You change shells at a cleansed Beacon or at the Shell Keeper in Marrow Keep. There is no second hub with a different name. Seal swaps belong at the same rest — you wear one Seal. The sit is free. Spreading Glimpses across every host you just unlocked is not. Possession is cheap; memory spend is not.
Resting brings nearby enemies back. That is the tax. Use it when the room is finished or when you want the pack again for a drop. Do not sit because the flask is at two charges and three trash mobs are still down — you will stand up into the same three. The rest-versus-push call lives later on this page; the rule starts here: a Beacon is a reset button that also heals.
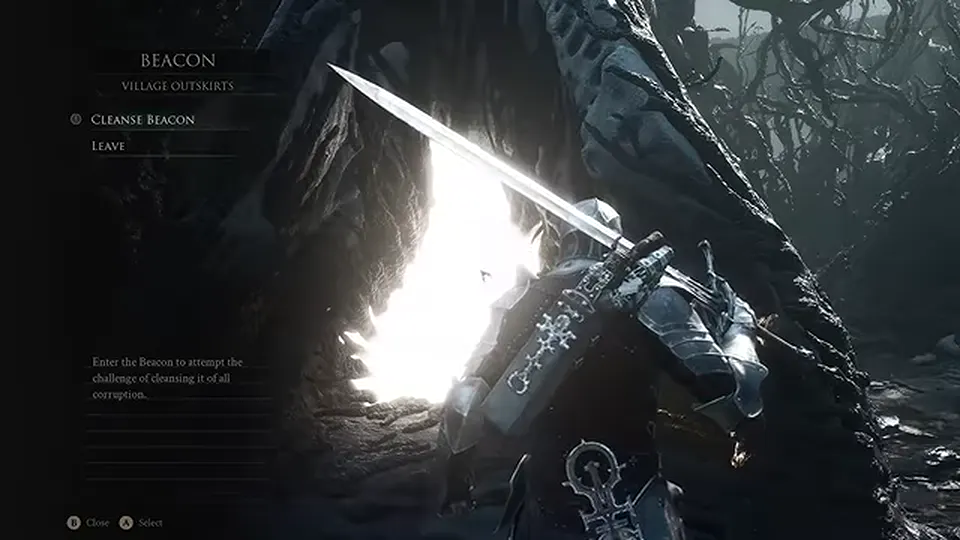
Always, as soon as you can survive the interior. Most Mortal Shell II beacons start corrupted. You enter the challenge, finish it, and the site purifies. Ova appears — pick it up. Then the rest menu, Mother’s Pulse refill, Shell swap, and Mether’s Pulse / Mether’s Breath come online. Skipping a corrupted stone to “save time” skips Glimpses, flask strength, a story beat, and sometimes the only key that opens the gate sitting next to it.

| After a cleanse | Why you do not skip it |
|---|---|
| Ova | Story item — take it to Marrow Keep |
| Glimpses | Feed one Shell’s lines; density is highest on the cleanse road |
| Flasks | Mother’s Pulse gets stronger as you cleanse; Merrick later sells charge / heal parts |
| Rest / travel | Unlocked after purify — this is the “you can route” checkpoint |
| Nearby gate | Some locks open only when the Beacon outside is cleansed |
| Franz key | First cleanse often drops the Muradean Actuator — main-weapon enhance unlock |
| Achievements | Cleanse All Beacons and Collect all Ova both start with this habit |
A corrupted Beacon is a short challenge wrapped around the stone. Complete it. Do not treat the interior as a dungeon you can come back to “later” while you hunt a prettier landmark. Widow’s Overlook looks like the hub. Village Outskirts is still the first purify this page trusts. If a door will not open, look for a corrupted Beacon on the outside of that gate before you invent a key item.
A second shell does not help if you cannot rest. Beacon first, optional loot second. Dual-wield melee plus a Duality Tarstone can sit near a site — pick that up after the purify, not instead of it. Stone rules: tarstones. Once the site is clean, the next waste is leaving Ova in your pocket while you wander.
Ova is the story object the Harbinger is here to reclaim — Undermether’s stolen clutch, not vendor trash. Cleansing a Mortal Shell II beacon makes one appear. You carry it to Marrow Keep. That return is the beat. Exact Ova counts stay TBA. This page will not invent a full-collect table to look finished. The trophy names that matter here are Collect all Ova and Cleanse All Beacons — both are habits, not a pin list.
| Ova job | Do this |
|---|---|
| On purify | Pick it up immediately — it is not floor scrap |
| Next walk | Return to Marrow Keep before you start a second region |
| At the Keep | Turn it in; then use Franz / Merrick / the Shell Keeper on the same visit |
| Glimpses on the same road | Bank them on one Shell — cleanse is where they cluster |
| Collect all Ova | Achievement / trophy — count TBA; do not skip cleanses to “save time” |
| Cleanse All Beacons | Sister trophy — same habit, different counter |
Ova goes to the Keep. Franz sits in the Keep. The first cleanse — Village Outskirts — also drops the Muradean Actuator (captions also say Moradian or Meridian; spelling stays TBA). Hand that to Franz to unlock main-weapon enhance. An early vent can already raise Iconoclast — treat that as partial smithing, not a second desk. If those two reads conflict on your save, the exact menu gate stays TBA. Pair the Ova walk with the actuator walk so you are not commuting twice.
Glimpses buy Shell memories. Ova buys the story step and the collect trophy. Do not spend Glimpses on maxing the Shell Keeper’s location hints while an Ova is still in your pocket. Possess first, turn Ova in, then buy the next pin if you are actually lost. The shells page is the roster; this page is why you walk home after every purify.
Matched by build plan, shared topics, and guide progression — not random related links.
Rest when the room you care about is finished, or when you want that room back. Push when the pack is already down and the flask can cover the next door. Sitting at a Mortal Shell II beacon respawns nearby enemies. That is the whole decision. Heal and Mother’s Pulse refill are the bait. The respawn is the cost. Mid-clear rests are how a clean path turns into the same fight twice.
| Situation | Sit or push |
|---|---|
| Flask empty, room clear | Sit — refill Mother’s Pulse, then leave |
| Flask empty, pack still down | Push to a safer tile or accept the death refill — do not sit on the pile |
| Just cleansed, Ova in hand | Sit only after you want the nearby pack gone or back; then walk to the Keep |
| Need a Shell or Seal swap | Sit — the swap is free; the respawn is the tax |
| Need Mether’s Pulse to another site | Sit / travel — you already paid the cleanse |
| Farming a drop on the approach | Sit on purpose — that is the reset |
| Mid-clear “just a sip” | Push — the sip respawns the sip’s problem |
Dying refills Mother’s Pulse. That is not a reason to suicide for charges when a cleansed Beacon is ten seconds behind you. It is a reason not to sit on a half-cleared stair because you want three drinks for a fight you already started. If you die on the push, you get the flask back and the pack was going to reset anyway. If you sit mid-clear, you spent the reset without finishing the room.
A fresh cleanse feels safe. It is not a camp. Swap shells, swap the Seal if the next boss wants a different tell, drink, and walk. Named-fight sheets live on the bosses page. This page only needs you not to treat the new rest as a living room. Trophy hunters still cleanse every site they can reach — Cleanse All Beacons does not ask you to live on them.
Players searching all beacons Mortal Shell II want a full map. The complete list stays TBA. This Mortal Shell II beacons page will not invent a 60-name table to fill that query. The first-region pins this site already trusts are enough to start: Village Outskirts, the water makeshift Beacon for Proxima, and Widow’s Overlook. Order and chores after Harros sit on the walkthrough.
| Pin | Why it is on this page | Then |
|---|---|---|
| Village Outskirts | First cleanse this site trusts — Ova + Muradean Actuator (Moradian / Meridian) | walkthrough |
| Water makeshift Beacon | Possess Proxima after the left blocked path / bridge from Marrow Keep | shells |
| Widow’s Overlook | First-region hub rest — Tiel southeast, Proxima north on the same landmark | shells · walkthrough |
| Marrow Keep | Not a Beacon list row — the hub you carry Ova to (Shell Keeper · Franz · Merrick) | beginner-guide |
| Every other name | TBA — do not invent Sester / Revere / mine labels as a finished atlas | This page, later |
Do not skip the outskirts because Widow’s Overlook looks like the “real” landmark. The first purify is the first Ova plus the actuator Franz wants. Spelling on that drop is messy in community captions — this page uses Muradean Actuator and logs Moradian / Meridian as aliases. If Franz will not enhance until it is in his hand, that is this cleanse. If Iconoclast already took a vent rank, keep spending on the same blade.
From Marrow Keep, the previously blocked left path and the water makeshift Beacon are how you possess Proxima. Rest there, then walk the same first-region road toward Widow’s Overlook. Overlook is the hinge, not the end of the game. Tiel sits southeast of that hub; Proxima’s water pin is the north / water read. Unlock routes stay on shells. Optional Great Arbiter of Flesh near the overlook is a bosses fight, not a Beacon.
Later region labels will land when they are verified. A locked gate with a corrupted stone outside is still the same rule you already have. Cleanse it. Take the Ova home. Do not wait for a complete Mortal Shell II beacons spreadsheet. The tips page flags the walk-past mistake. Achievements will own the trophy counters once that sheet is Stage 3. This page owns the habit.
After a cleanse: rest, heal, refill Mother’s Pulse, swap Shells or the one Seal, and fast-travel with Mether’s Pulse / Mether’s Breath. Resting also respawns nearby enemies.
Complete the interior challenge. The site purifies, Ova appears, and rest / travel unlock. Most Beacons start corrupted — do not walk past them.
The story item that appears when you cleanse a Beacon. Carry it to Marrow Keep. Exact counts stay TBA. Collect all Ova is a trophy; it is not vendor trash.
Not on this page. All-beacons map stays TBA. This guide will not invent a 60-name table. First pins: Village Outskirts, the water makeshift Beacon, Widow’s Overlook.
Village Outskirts. Take Ova home and loot the Muradean Actuator for Franz (also called Moradian / Meridian; spelling TBA).
Yes — at a cleansed Beacon or at the Shell Keeper in Marrow Keep. Switching is free. Splitting Glimpses is not.
Mother’s Pulse is the heal flask (default 3 charges; refill on rest or death). Mether’s Pulse and Mether’s Breath are fast travel between cleansed Beacons.
Resting respawns nearby enemies. Do not sit mid-clear unless you want that pack again. Push when the room is already down and the flask can cover the next door.
Sometimes. Some doors stay locked until you cleanse the Beacon sitting outside them. Look for that stone before you hunt a fake key.
Cleanse All Beacons and Collect all Ova. Full trophy sheet stays on the achievements page.
The water makeshift Beacon after the left blocked path from Marrow Keep. Widow’s Overlook is the nearby hub rest.
No. Mortal Shell II is standalone. Single-player only — there is no co-op warp.
First-region order: walkthrough. Opening chores: beginner guide. Host roster: shells. Named fights: bosses. Trophy counters: achievements.
August 18, 2026
Matched by build plan, shared topics, and guide progression — not random related links.